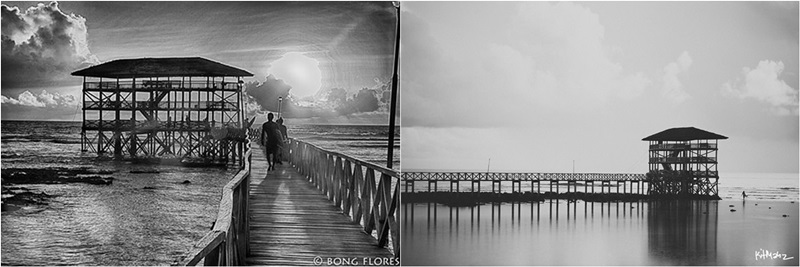
The Black and White Photography Challenge is making rounds on Facebook. I love looking at the work of my friends.They never fail to impress me. Their work gave me ideas on how to shoot photos the next time an opportunity arises. Sometimes I ask them questions on their techniques and accessories they use. They are also generous in sharing what they know.
For some reason, two friends of mine tagged me to do the challenge on the same day with photos from same shoot location. I obliged. These are two people I look up to in photography. It is an honor to be challenged by them.
The two of them identified me as a blogger. Hence, this blog post. In the challenge, I was asked to post 1 Black and White photo each day for five consecutive days and tag one friend each day to do the challenge.
I started choosing photos in my folders that I think were crisp enough to be manipulated using photo editing software. Yes, I often compensate my limited photography skills with my IT skills. Googling is one of my special talents. I searched Pinterest for ideas and forums and blogs for tutorials. Kinarir! (You’d think this is my career.) In a recent out-of-town trip with my cousin, I choreographed some shots and I told him how I would post-process the photo. To which he replied, “You are not photographer; you are a photo editor.” Haha Well, yes, I am an editor!
As much as I love colors (proof of which is my tendency to bump up saturation sliders in apps to get the brightest of colors in photos), black and white photography has its own charm. I would rely on shadows and shades to allow my photos to show depth and character. In many instances in the past, whenever I get blurred photos, I turn them to black and white to save the photo from deletion. This time around I specifically chose photos that have potential for enhancement. I post-processed some photos that in the end did not pass my strict standards for this challenge. Feelingera lang, may standards pa akong nalalaman. (I am pretentious. I have make-believe standards. Hehe!) Here are the samples of the rejected photos I edited. Charing. Parang reality contest, may elimination round. (Kidding. Just like a reality contest, there is an elimination round.)
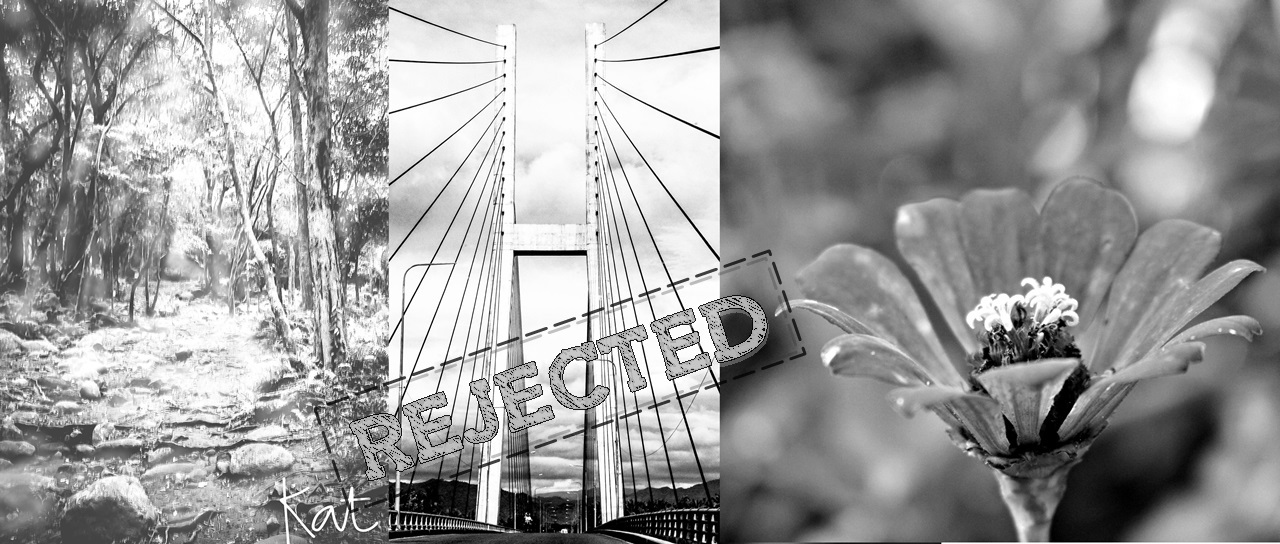
In the first photo, I wanted to it to have that enchanting forest feel to the image but it was a blurry image and I felt dizzy after staring at it while editing. I chose another style of editing for the second photo that I had to redo post processing. In the third photo , the flower did not stand out from the background.
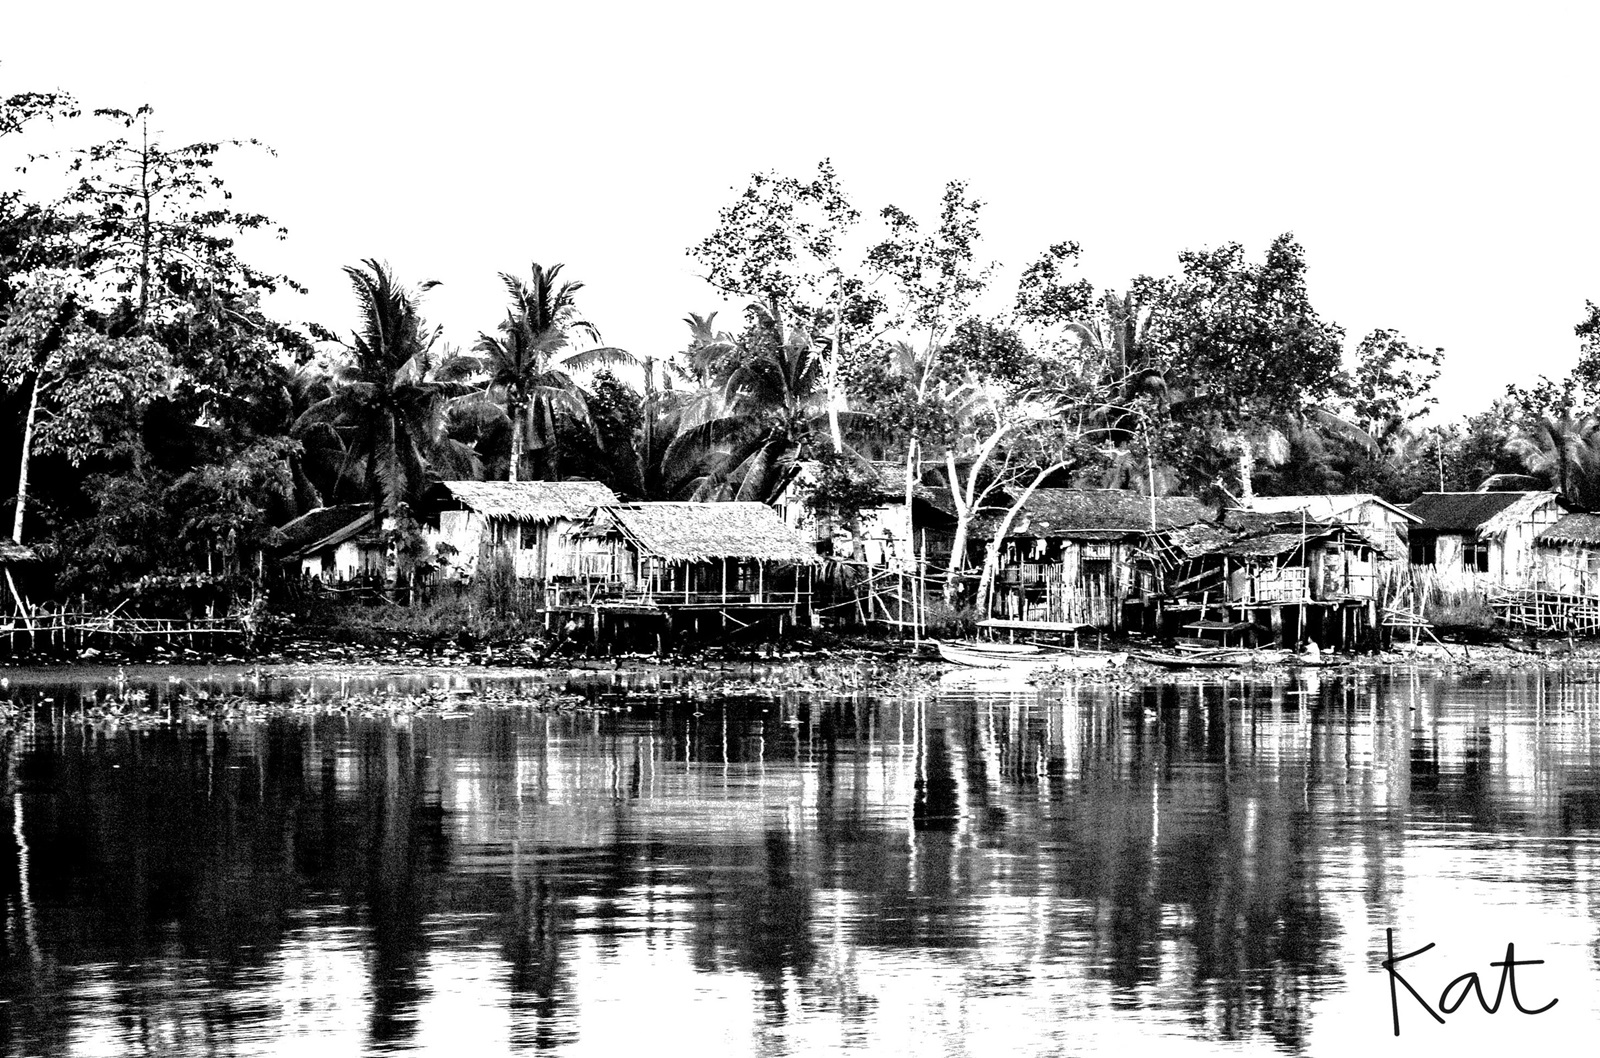
These are the photos that made the cut. Naks!
This was taken while I was on a pumpboat to Magallanes. I like this photo because of the reflection on the water. However, there is something that needs to be done here . We live in a flood-prone area. Those living near the water need to be relocated. This photo was taken a year ago but I still saw these houses when I passed by this area two weeks ago.
My cousin recently bought a car. We took the vehicle for a joyride around town. I was seated in front and I brought my camera along. Thus, I got a good spot for snapping photos. I re-edited the photo. This is one of my rejected photos. I rejected the editing. I am fond of high contrast and high exposure photos that I end up with bright whites which in the rejected photo eliminated the beauty of the clouds so I repeated the post processing and went easy with the exposure.

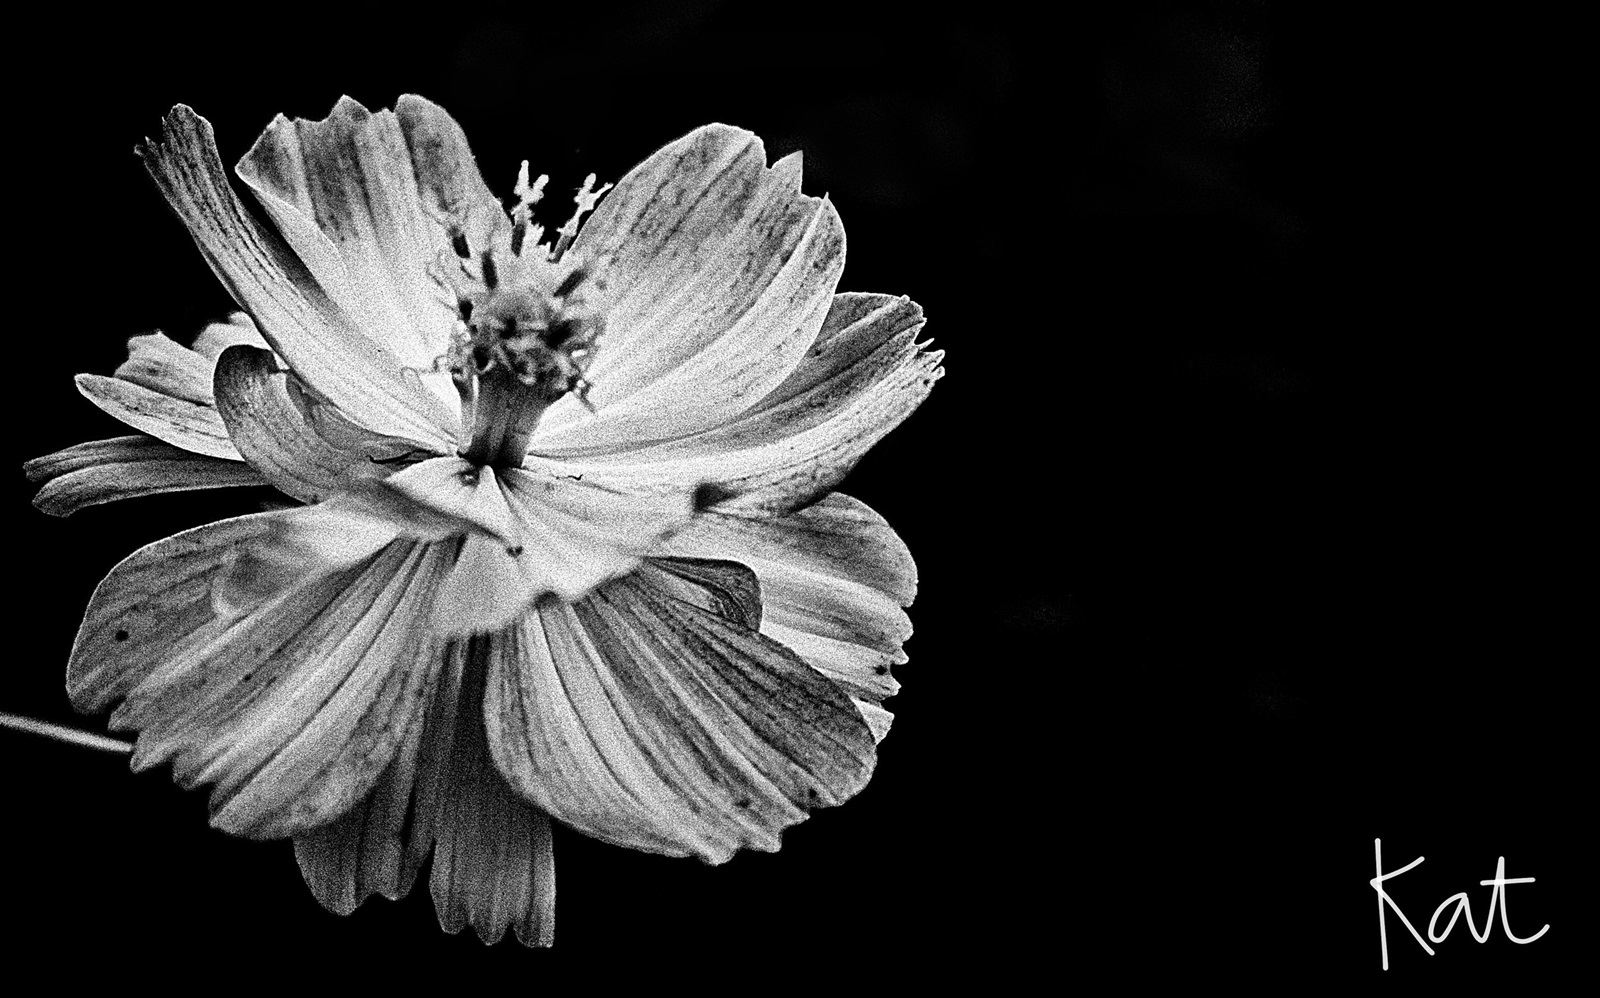
When I first bought a digital point-and-shoot, one of the few tricks I tried to learn was to shoot using its macro feature and my favorite subjects are flowers. Nine years later, I still love taking flower photos. This is a photo of a flower called cosmos. I hope I got the name right this time. This is an example of my tendency to edit photos using high contrast and detailed sharpening. One can see the grains and specks which I shall declare that they add character to the photo. Palusot! I have edited the photo several times over because I worked on a low resolution one which showed some pixelation when viewed on a tablet. OC lang. My cousin gave me some tips on working on the luminance to remove the black specks (in photography, they call that noise). I will keep that in mind.
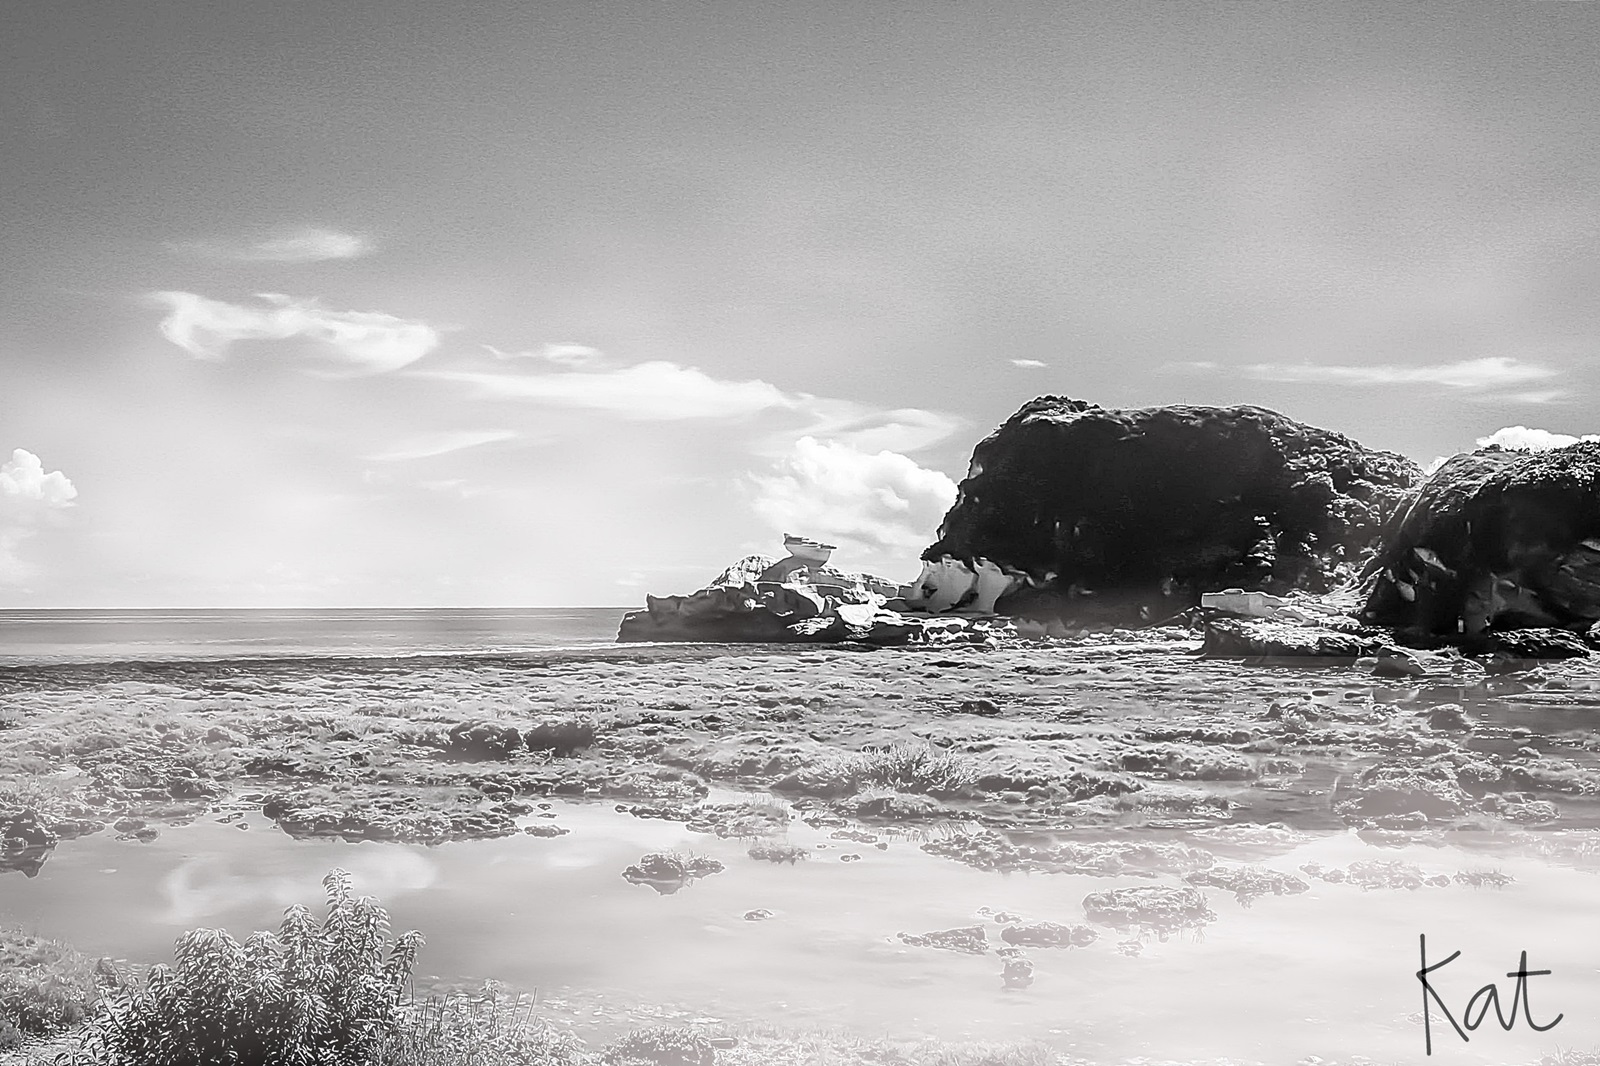
For my fourth photo, I wanted to use a photo taken from one of my trips. Because I noticed my fondness for jet black photo, I tried to go for a lighter tone. I also learned how to add some haze on the photo for that dreamy effect. This was in Kapurpurawan, Ilocos Norte.
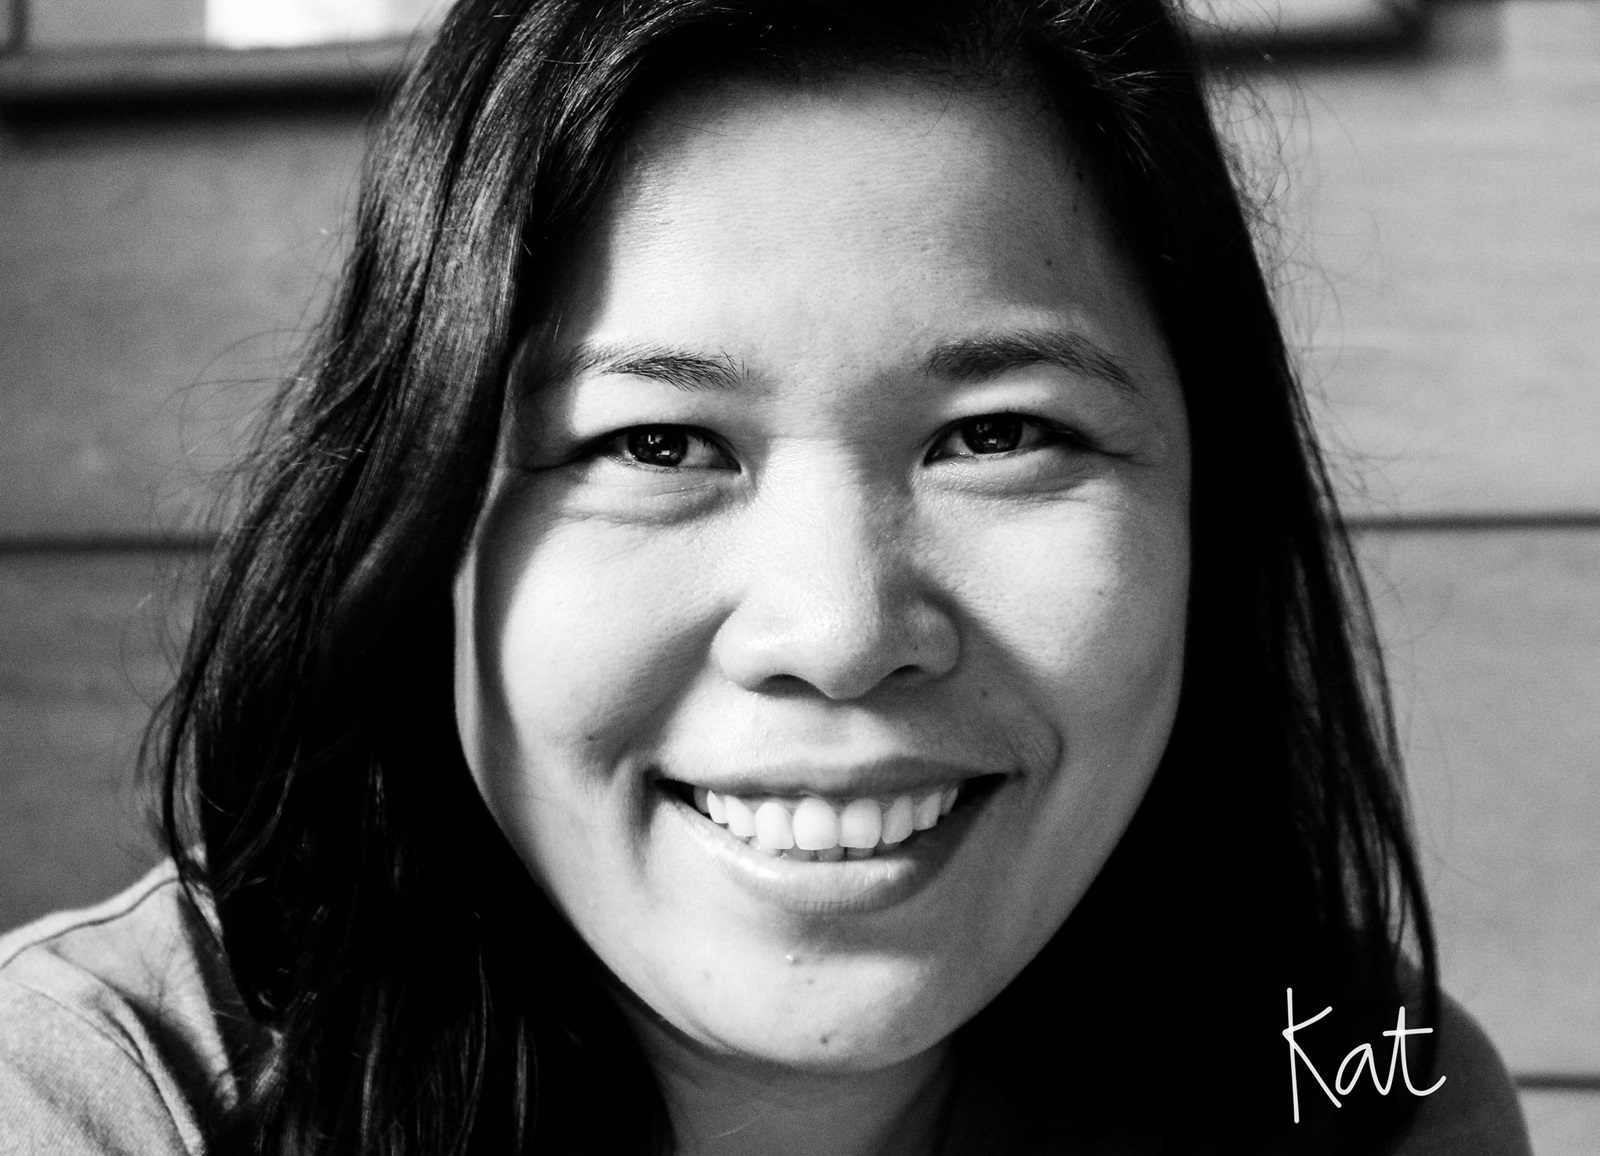
For the fifth and final day of the challenge, I saved the best for last. KIDDING!!! I tried to showcase (showcase talaga? kumikitang kabuhayan? NOT!- — Really? Showcase? Like a successful livelihood?) the range of the what I can do with photography my editing skills by using different subjects and different compositions. I try to post photos I have not posted before. For the final day, I wanted to do portrait. Because I lack time to find a model and most of my photos of people are already on Facebook, I have no other choice but do a self-portrait. (Napilitan lang kunyari. — I am acting like I am forced to do this.) Having tried to photograph myself using the timer (lumabas din ang katotohanan. ginusto niya to! LOL — The truth surfaced. She likes doing this. ), I know how exhausting it is to go back and forth, set the timer and pose for the camera; only to find out that the focus did not turn out right. Here’s the secret to a stress-free self-photography: tripod, camera cable and laptop. Prop your camera on a tripod, connect the cable to your laptop, use the live viewer of your camera software, position yourself in front of the camera while holding the laptop, view the image on the laptop to get the angle and pose till you get the shot you wanted then click the button on your software to take a photo. Oh, another tip: take advantage of the diffused morning light from your window. 😉 Voila!
This has been an exercise on creativity. I have not done much watercolor art recently so I welcomed this kind of challenge in creativity. I realized that there is so much to learn but I enjoyed the process. Oh, by the way, I added my watermark on the photos. It is not a font. It is my own handwriting. I used an app called Sketches. I used the tablet since the screen is bigger. I used the app and wrote my name using my forefinger, saved the image and superimposed it on my photos. (I googled how to make the background of my watermark transparent so it would look like I wrote directly on the photo.)
That was a long post. Thank you if you have read until the end of the post. I hope you learned a few tips or two. Feel free to leave a comment below. You may give a critique about my photos.
By the way, my friend, Kit, belongs to a group who does wedding photography and videography. Like their Facebook page if you want to hire them or just be inspired with their work: Infinity Studios.
My former colleague, Joseph, also does wedding photography. To get in touch with him, like his Facebook page: JosephGaw Photography.
Actually sis, I was tagged to the challenge too by my officemate but wasn’t able to do the challenge as in busy-bee ang peg, yung na lang ang reason ko for not doing the challenge. It died down in my part.. toinkz! sayang…
You can start when you are not busy anymore.
Soon sis.. I’ll try to do it.. 🙂
Cool black and white photography. I too love to take photos of flowers but haven’t really ventured into black and white at the moment.
I love all the photos and to be honest pwede kanang photographer Sis. All your photos are pretty nice! I was laughing reading your post about kinarer, and all the tagalog words hehehehe. Hirap kayang model and photographer at the same time. Great job.!
Thanks, Melgie! One day, I’ll blog in Tagalog and Bisaya!
Hahahha That’s sounds pretty good. Wow! you know how to speak Tagalog and Bisaya? I speak Bisaya too! heheh Your photos are amazingly good!
Yes, Melgie. Kabalo ko magbisaya. I speak Bisaya everyday! Bisaya is my main language.
I love black and white photography. It is so deep, expressive and emotional, sometimes it renders a specific mood or feeling better than the colorful photos. I love these art pics, they are so professional and amazing!
I am a big fan of B&W photography. I do love taking pictures and turn them to B&W. There was even a pic taken by my iP5 of my couple friend’s wedding, they just loved what I took that the bride made it her profile picture on fb. 🙂 It’s nice to see plain beauty of pictures in Black and White! The pictures here are also just amazing!
This is something that I would love to do! I find black & white photos powerful – they can communicate emotions even in the absence of color.
Kat! I love the second photo. You really had a great shot – a good example of the parallel photography! Now I would like to look back on my photos and make a post in my blog about it. I will link this post there. I may not be tagged to do the challenge but it’s nice to look back at the photos I once took (I have a few black & white photos in stock).
Black & white photography makes people focus on the subject and the concept or story behind it. It is also why most documentary photos are in this setting.
Will let you know once I’ve linked your post on mine. Happy Halloween!
xo,
Louise of The Legendary Ukayista
Thanks, Louise! Yes, please let me know when you finish your blogpost.
Stunning images of the boardwalk! I do love black and white images, I know they aren’t to everyones taste however I always think you can see more emotion in a black and white image.
Oh wow, that picture that got approved is fantastic! Yeah, I’ve heard of this photography activity, but on Instagram. Didn’t know it goes by category.
I love photography but I have to be honest, I’m pretty slow at understanding the technicalities behind them. I read through your blog and I got lost in the terminology, heehee. I’d love to learn, though, so I’m attending a basic photography workshop next week.
Thanks for sharing!
No categories, May. I just made them up.
If I do the challenge, most of the photos may not make the cut. Hehehe go to Siargao in Aug-Oct. Or May when you wanna visit Bucas Grande (for the stingless jellyfish). Namiss ko tuloy ang pizza sa Kalinaw. I heard from my former colleague na sinemento na nila part ng daan way to Cloud 9. ..
Will ask for tips from you before I visit Siargao!
I am currently on my 2nd day of this so called Black and White photography challenge. I personally can say that this challenge is fun! the hardest part is nominating. hehe! Your b/w entries are so cool! It nice to see how you make your subject float over the background. Great job!
Thank you for your photo editing tips. Black and white photos are really classic looking, but yes, there is a skill needed to make the photo come to vivid life without color.
Have you ever had the problem where you can’t decide which is better? Coloured version or Black and White version of the photo? Everytime I tried black and white photography, this is what happened. And I will end up sticking to coloured ones! 😛
Like you, I always choose colored photos.
I love to take photos but unfortunately, I’m no master of the craft. I’m fond of editing and some of my captures are converted. Yours are great. You proved to be worthy of the challenge.
I like staring at great pictures. I have Pinterest and tumblr and I could do that all day. Haha. However, I’m tamad at learning how to shoot. Luckily, the bf is interested so he’s the one learning and he’s teaching me.
I like the third photo, the flower. Also, the Siargao pics are so tempting! I’d love to go there next year!
I love the quote at the end, and I understand why you did the challenge. You have creativity Kat, and as always, I admire your photos. 🙂 I also never thought that photography is a bit complicated, heheh (may mga terms) or perhaps it’s just because makapicture lang ako okay na, haha. But anyway, please continue what you’re doing because we are always inspired by it.
Awww, sweet! Thanks, Kristine. Kunyari lang yan mga terms ko, wala masyado akong alam but we can all learn! Nice to see you around!
Beautiful photos! I so wanted to try photography too. Wish I could it next time. You look really inspired because of the output of your photo.
You still have fun with photography even with a smartphone,
Though i admit colored pictures are good tl look on, there is something appealing in black and white photos
I am not very good at photography but do appreciate the efforts of others. B &W photos are just lovely, but take a skilled eye. You have done very well here..
Sometimes, noise brings out the character of a monochrome photo.
Selecting photos for a black and white shot is fairly challenging, I always feel some vibrant bright colour photos will just not make the cut for the monochromatic drama.
So far, I haven’t been tagged for B&W challenge. Lucky me. lol~
Tawang tawa ako sa side comments. hahaha. Kumikitang kabuhayan?? hahahaha
Anyway, Black and white photography does have its charm. My favorite from your photos is the one of the flower. Maganda!
Hehe! Hirap itranslate. Nawawala punch line.
What can I say, but Wow! You really have a good eye for photography. Even if its black and white, the photos are amazingly colorful in my eyes.
The photos looks great. I love doing black and white pics too but I cannot find a nice subject.
I love B&W photos. They just have something that interests me and I can’t figure out what is it. Love your shots! 🙂
I’ve heard of Mr. Randy Yu from my friends in Nasipit as they are aspiring models and it is Mr. Randy Yu that does their pictorials etc. Love their photos! 🙂
These are great techniques I have to try soon. It’s complex learning it alone from the manual. I love the grandeur of the bridge, btw.
p.s. I can’t reply in your comment in my blog about Fisher Mall. Maybe because we’re on a different platform? And yes is the answer 🙂 And the owner is a fishing magnate, according to my daddy.
I am a photographer wannabe and I admire people who can take beautiful photos. Thank you for sharing your techniques in this post. I love all the photos you have shared, they all looked taken by professionals. I hope like you, I will be able to compensate my lack of photography skills through user friendly photo editor (unfortunately, I’m also not a techie person so I don’t know how to use Photoshop).
Try Photoscape. It is easier to use than Photoshop.
How’s the Black and White challenge going for you? Did you manage to get any photos selected in the end?
The challenge was to post 5 photos and tag someone on facebook to do the same. The 5 photos I identified above were the ones I posted. I have completed the challenge before I posted this one.
Your pictures are gorgeous! I really like the Magallenes one… Reminds me of a picture I took in Kuching, Malaysia some years back as we cruise down the river.
Thanks for sharing!
Best,
Ling Tan
http://www.kidsonboard.net
[…] the city inaccessible by public commute unless we hire a transportation for a fee. I took one of my B&W photos during this […]
On my first visit on this post, I focused mainly on the photos and find it really great. As I read on the content, there are tips on making B&W photos pala. Thanks for the wonderful tips especially in editing.